North Sutherland and the Caithness Coastline (Lybster Harbour to the Dunnet Head Puffins viewpoint) (Part 1 of 2) |
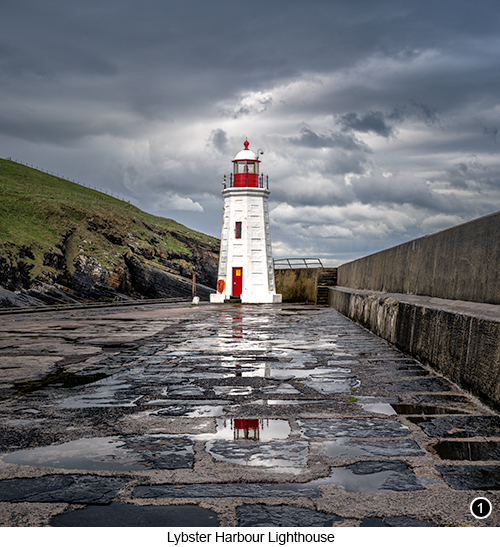
This two part photographer's route guide, will take you from Lybster Harbour in the North East of Scotland, as shown in SHOT 1 to the right. Then all the way around to Moine House in the North, North West of Scotland. Including the entire North coast of Caithness in between. However even though I am writing these as 'stand alone' chapters, if you would like to read my photo guide, for the South East coast of Sutherland. Which is the chapter that leads you all the way up to this point at Lybster Harbour? Then click HERE ...and if you want to read one of my other photo guides, that continues on from where this chapter ends, at Moine House in the North, North West of Scotland and continues on, towards the North West Sutherland area of Scotland? Then click HERE Lybster Harbour Lighthouse: the Lybster Harbour Lighthouse, is a beautiful old, hexagonal, white painted lighthouse, which was completed in 1884. The old lighthouse at Lybster, stands at just over 30 feet tall and can be found at the head of the South pier boat mooring area, right next to the main harbour wall. As shown here, in SHOT 1 to the right. This historic and very photogenic landmark, sits next to the seaward entrance, of what was once, one of the busiest herring ports in Scotland. Supporting hundreds of fishing boats and thousands of ancillary workers in the area. There are of course many myths and legends, that are connected to this old harbour, the lighthouse and the sea that surrounds it. Such as several phantom ghost ships. Who are said to appear at night, with their yellow glowing lanterns, that can be seen flickering through the mist. As well as stories of mermaids and sea spirits, that would endlessly try to mesmerise sailors and lure them away from their boats, into the sea. Where they were quickly swallowed up by the waves, never to be seen again. It is also said, that on calm, quiet misty nights. That the old harbour walls, begin to echo with the ghostly voices, of the many sailors who lost their lives here. Lybster is also mentioned in ancient Scottish folklore, as being a "Thin Place". Which is a term used to describe, how the veil between the physical and spiritual worlds, is weak here and which allows spirits and ghostly apparitions, to easily pass through it. |
 |
How to get there: Lybster Harbour Lighthouse: get onto the A9 heading North and continue North, until you reach the coastal village of Latheron, where the main A9 road turns off at a junction to your left and the road you are now driving on, becomes the A99, Street View, Map View. So keep to the right heading North on the A99, for another 6 miles. Until you come to a right hand turn, signposted for the village of Lybster on your right, Street View, Map View. Take this right turn and drive down through the village, firstly along Village Road and then Main Road. Until you see a sign pointing to the harbour on the right and take this turn, Street View, Map View. |
|
|
You will then drive down a steep hill, passing by a very photogenic waterfall on your right (as described in a previous chapter you can find HERE). Then all the way down to the bottom of the road, where you will find there are several places you can park. But PLEASE NOTE, this continues to be, a fully working fishing harbour. So daily catches are still being landed here and then transported out, in large refrigerated trucks. Which means full access to the harbour, is required at all times. So please do not block access to the harbour and try to park considerately out of the way. For SHOT 1 shown above, we arrived here, just as the rain started to come down in stair rods. So with nothing much else to do, we broke out the flask and made a nice cup of tea. Helped down with a couple of dark chocolate digestives. As we waited for a gap to appear in the clouds. Which took about an hour to arrive. So having visited and photographed this location, in all types of weather. I knew there would be a lot of standing water on the flagstones, in front of the old lighthouse and how I could use this to grab a reflection. But I also knew I had to be quick, as the concrete joints between the old flagstone, have become porous over time. So the standing water, would immediately start draining away, as soon as the rain stopped and the opportunity to shoot the old lighthouse with a reflection, would be gone. It was then just a case of moving my tripod around quickly. Until I found a view of the old lighthouse, that maximised its reflections, in the old water covered flagstones. But with the passing storm clouds, still visible and moody in the background.
|
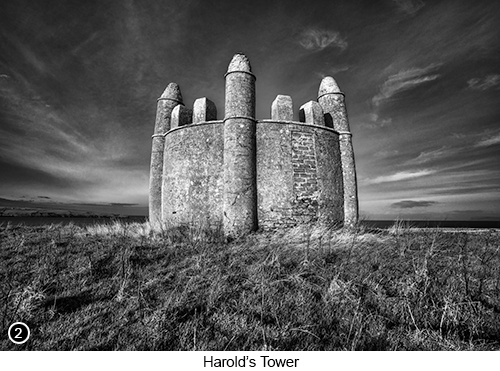
Harold's Tower: Harold’s Tower, as shown in SHOT 2 above and SHOT 3 below. Was built in the mid 1700's, by Sir John Sinclair of Ulbster, to entomb deceased members of his family. But who first had to dismantle, the 12th century ruins of a chapel, that was already there. Even though the chapel ruins, still represented something very meaningful to the locals. Due to it containing the remains of Earl Harold of Caithness. It is also said, that the original 12th century chapel, had been built in such an odd location next to the sea. Due to Harold being killed on this exact spot in 1196, after taking part in a battle between good and evil and who was then buried here where he fell, by the villagers as a mark of respect. The locals then decided to honour Harold even further, by building a shrine over his grave. Which in time became a small chapel, but which eventually fell into disrepair. |
|
Then Sir John Sinclair came along in the mid 1700's and took over this land. But knowing how the locals felt about Harold's chapel. He wanted to make sure, after he'd had it dug up and removed. That this new building was his and had nothing to do with Harold. So he had a plaque built into the new tower, announcing it to be: "THE BURIAL PLACE OF THE SINCLAIRS OF ULBSTER". The locals on the other hand, continued to refer to it as Harold's burial place and apply his name to the site. Which over time, became known colloquially as Harold's Tower. Even though his chapel and his remains, were no longer there. To get to Harold's Tower from Lybster Harbour, takes around 40 minutes by car (42 miles). So first drive back out of Lybster Harbour, then back through the village, to the junction with the A99 and turn left heading South. You are now heading towards the village of Latheron, Street View, Map View. So keep driving until you reach Latheron, where you will see a right turn onto the A9, heading for Thurso and Scrabster and turn right here, Street View, Map View. Continue driving up the A9 for around 40 miles, until you arrive at the Town of Thurso, Street View, Map View. Where you will arrive at a crossroad with traffic lights and the A836 heading towards John 'O Groats on your right. Turn right here and head towards John 'O Groats, Street View. But only drive up the A836 for a mile or so, until you see a fork in the road. With the left fork leading to an unnamed single track road, that leads to Harold's Tower. Which you should now be able to see in a field ahead of you, Street View, Map View. |
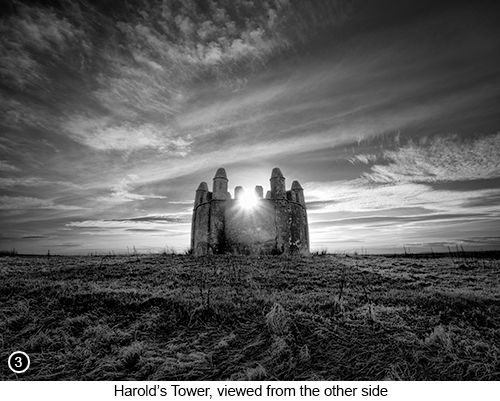 |
Keep straight on driving along this unnamed road, for as far as you can. Until the paved road bends to the left and a farmers track, continues on towards Harold's Tower, in a field to your front right, Street View. At which point, park wherever you can, without blocking off the road. Grab your wide angle lens etc and walk up the farmers track on the left of the field, towards the tower in the near distance. Now the first thing you will notice, when you are stood in front of Harold's Tower, setting up your tripod and looking for a composition. Is just what a weird and wacky shape Harold's Tower is, as can be seen in both of the photographs shown above. Which to my mind, looks like a small, sea facing defensive tower. But built in the shape of a large, round sided witches cauldron. Which has then been surrounded by thick, curved, phallic looking towers. In other words, this structure is totally unique and very photogenic. |
|
|
|
Now whoever the person was who designed it and whatever it was they were trying to make it look like or represent, I have no idea. But what I can say, is it certainly has a very unique, eye catching design. Which is both extremely weird and fantastical at the same time. Yet provides us with such an amazing subject to photograph in the landscape. You will also find when you get close to Harold's Tower, that it sits on top of a small, flat topped mound and even though the rest of the field below it, will probably be ploughed, or full of crops. The small mound itself, is left untouched by the farmer to grow wild. Which I think is a good thing, as it allows you to frame up this gnarly structure, surrounded by random weeds etc. Which to my eye, seems to suit the moodiness of the subject. Especially when captured in black and white. As can be seen in SHOTS 2 and 3 above. |
|
|
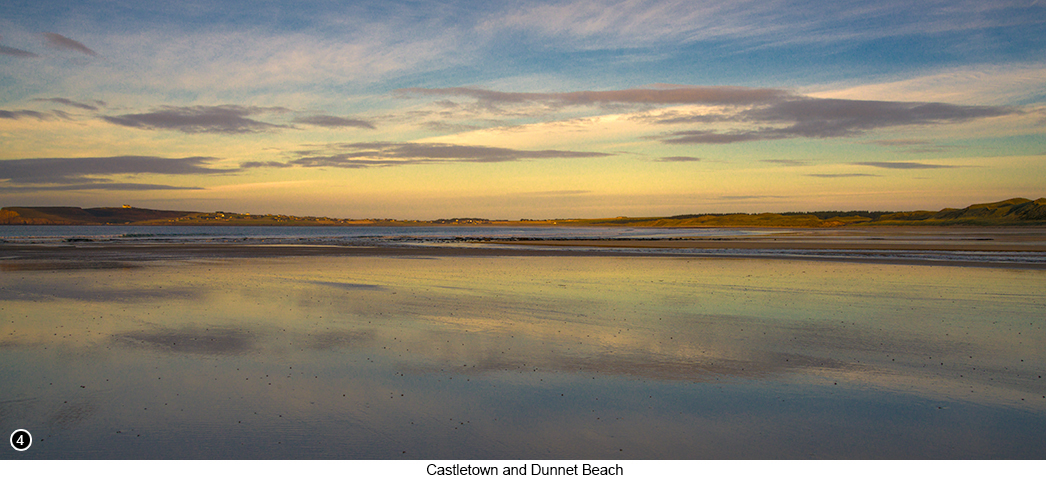
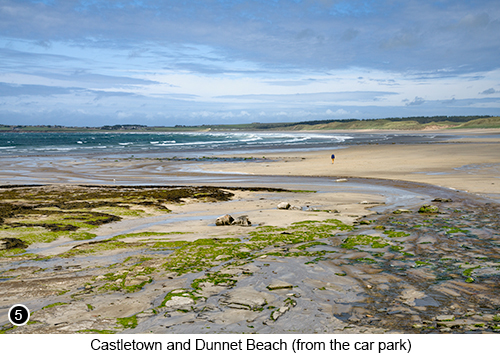
The best way I found to shoot Harold's Tower. Was to get in close, with my 16-35mm lens mounted on the camera, set at 16mm. To emphasise its weird, bowed out, cauldron like shape. I then leaned the camera down slightly, so I could also elongate those phallus shaped columns and make them stretch, a little further up into the sky. I also bracketed the shots, with a plus/minus 2 stop 3 shot bracket. Which allowed me to process the images back on the computer. To capture as much of the detail as I could, in both the highlights and the shadows. Castletown and Dunnet Beach: When you have finished photographing Harold's Tower. If you retrace your steps back, along the single track, unnamed road. To the A836 and then turn left away from Thurso, Street View, Map View. Then continue driving for another few miles East, along the A836. Until you reach a large, official, car parking area, at the side of Castletown and Dunnet Beach. As shown in SHOT 4 above, SHOT 5 to the left and SHOT 6 below, Street View, Map View and drive left into the car park and park wherever you can. You will then see a large wide view of the bay in front of you. With the sea and the old ruined harbour of Castletown to your left and the almost white coloured sand of Dunnet Beach, arcing around the large bay in front of you, Street View. This is a fantastic location for a picnic and a spot of bird watching by the way... |
To get onto Dunnet beach, you can either walk down over the boulders to your left in front of the car park, where I took SHOT 5. Or you can walk back out towards the entrance of the car park. Where you will find a small wooden bridge over the burn to your right and a path that leads down to the beach, on the other side of the burn. Where I then walked out onto the beach at low tide, as I noticed how the burn on this particular visit, wasn't running through the beach like a small river, as it was for SHOT 5. But was instead, soaking through the beach itself, to make the whole beach look like a giant mirror. And how the sunset taking place behind me, was throwing warm, glowing light, onto the clouds in front of me. So it was simply a matter of walking around, looking for the most pleasing reflection I could find, then shooting it, as shown in SHOT 4 above. |
|
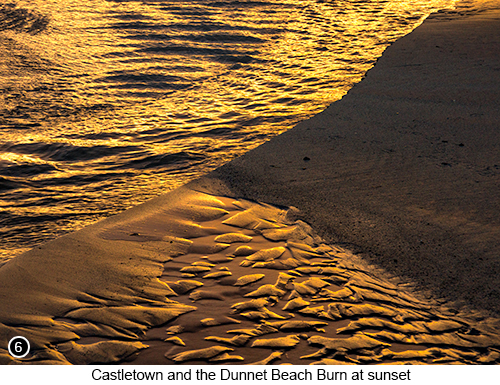
I then started to walk back to the car park, as the sunset (now in front of me), was really getting into full swing. With some amazing colours all across the sky. But I couldn't find anything to shoot towards the sunset from this viewpoint. As at this point on the beach, the sunset was taking place behind several houses on the horizon, at the back of the car park. Which just didn't look very photogenic at all. But then I noticed how the vivid golden colours of the sunset, were being reflected in the edge of the burn at the front of my feet, as shown in SHOT 6 to the right. Which allowed me to capture this abstract. Which is no competition winner I know, but which does at least show you, the potential of this area and what you might find here. SHOT 5 on the other hand. Was something more like a sort of grab shot of the beach. That I took while we made a cup of tea and broke out the biscuits (again...). I could see the shot I wanted, as soon as we pulled into the car park. So grabbed my gear to set it up quickly, before the light could change. But then I noticed a man walking onto the beach with his camera. And thought to myself, he's going to wander straight into my shot isn't he? So as I wasn't quite ready, I thought what the heck, I will continue setting up my camera and maybe, just maybe. He will have disappeared into back of the shot, by the time I've finished faffing around and am ready to shoot it. But the light was so good, I couldn't wait and so decided I would grab a handheld shot of the scene and clone him out later. But when I got the image onto the computer. I liked him in the shot and how he gave scale to the scene. So I left him in. |
 |
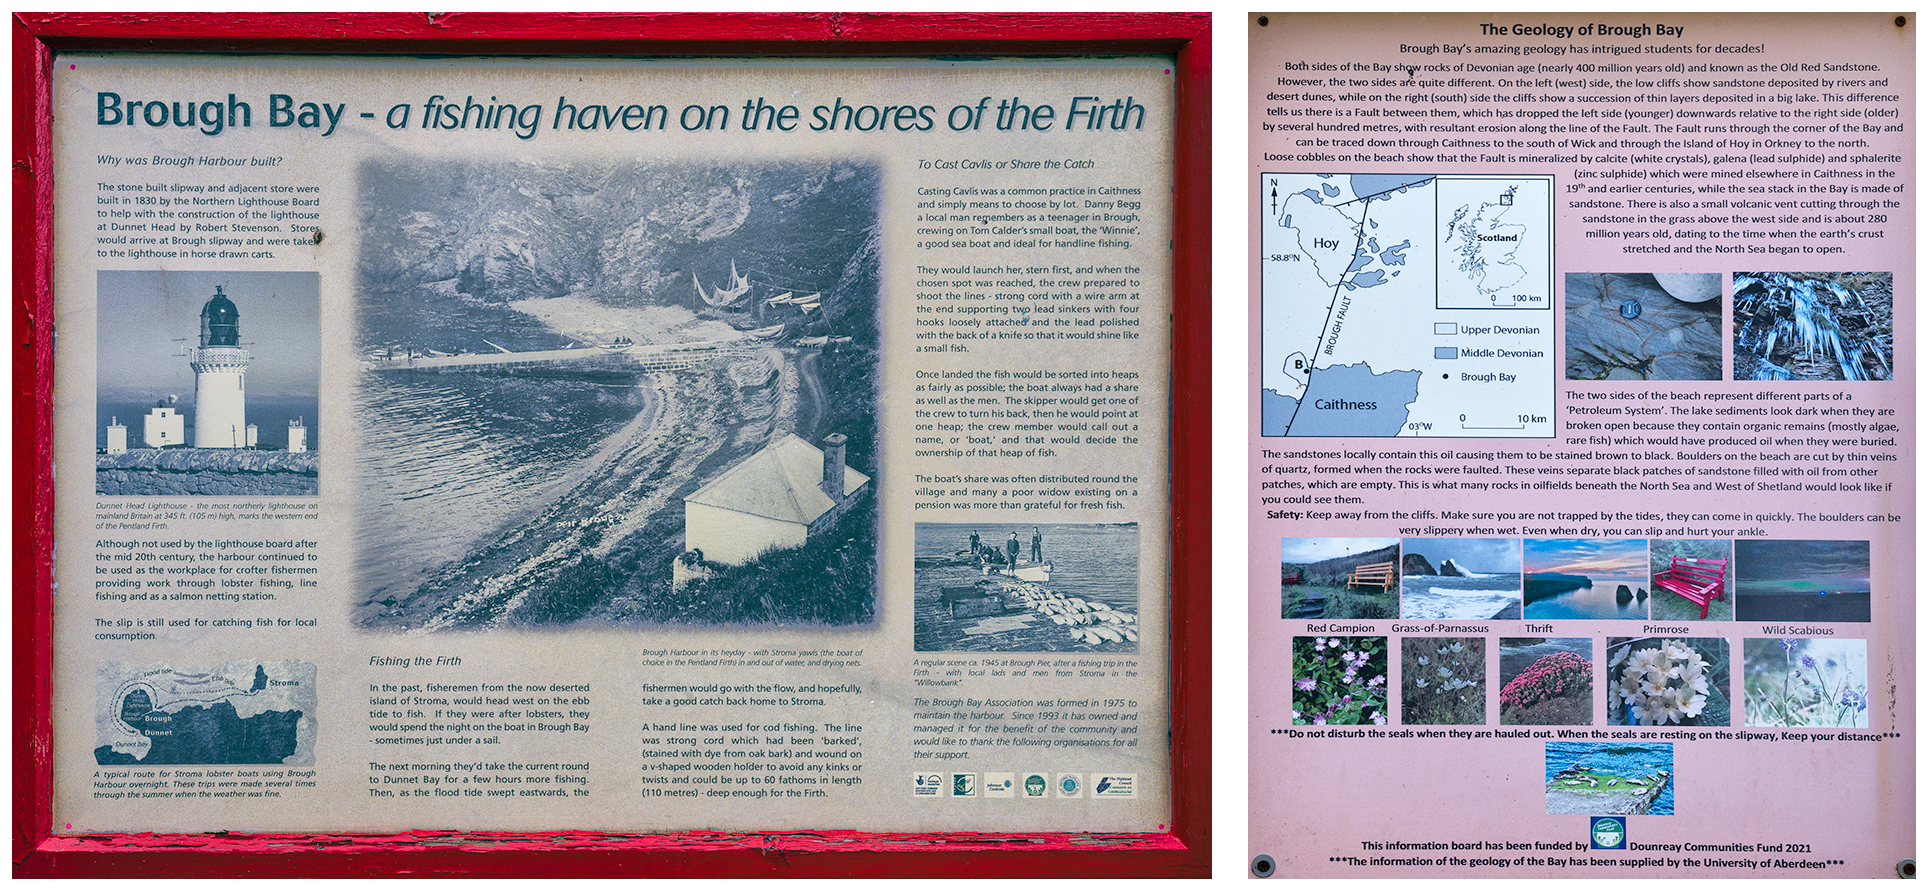
Brough Bay and the Brough bay Sea Stacks: The tiny village of Brough in Caithness, is known to be the most northerly settlement on the UK mainland. That has continued to prosper over the centuries, as a traditional crofting and fishing community. Due to its easy access, to the many rich fishing grounds in the area and which is thought to have originated, as a Viking settlement and stronghold, due to the many Viking artifacts that have been found here. But which in more recent times, the village of Brough, has evolved into a quiet, rural, seldom visited community. Where most people visiting this area, drive straight through it on their way up to Dunnet Head and the Puffin viewpoint. Which let's face it and as I will cover later on in this chapter, Dunnet head is a viewpoint, that is certainly worth rushing to get to. I mean who doesn't want to see some cute, close up views of Puffins, as well as to get the chance to shoot them and the many other types of seabirds you will find here. |
|
 |
|
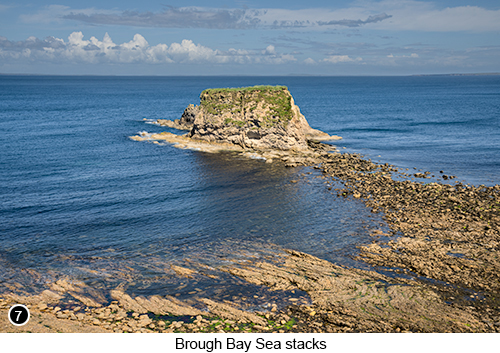
To get from the Dunnet Beach car park, to the Brough Bay Sea Stacks further up the coast. Get back onto A836 and turn immediately left. As you continue to drive North and away from the town of Thurso, Street View, Map View. Then just a few miles further along the A836 road. You will come to an elevated view, of Brough Bay and its Sea Stacks. Just visible over the edge of a cliff to your right. As shown in SHOT 7 above at low tide. If you then continue driving on just a little further, up to the apex of a tight, left hand bend. You will now see ahead of you on the right, the old, single track road down into Brough Bay, Street View, Map View. Which if you are driving a vehicle, with a reasonable amount of axle clearance? You are in fact allowed to drive down, this cobbled, unmaintained road, to the small Brough Bay parking area at the bottom of it. |
|
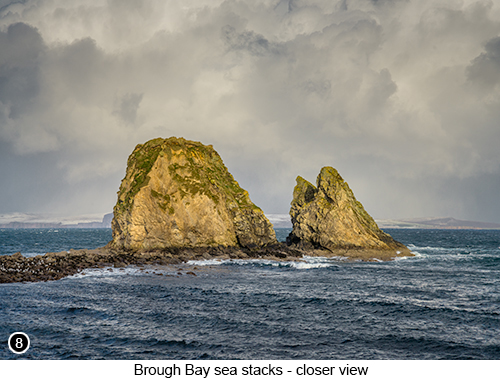
But be warned, as the road at this point is unpaved and becomes very narrow indeed and is quite challenging to drive over in parts. But nothing that an average vehicle, with a descent amount of clearance, shouldn't be able to handle easily, but with care. So if you want to drive down into the bay and feel comfortable doing so? Then go for it. Otherwise park in the open, unmaintained area, at the top of the cliffs. Where you will find enough space to park a couple of vehicles. On some spare ground between two houses, on the opposite side of the road from the cliff. Then make your way down into the bay, which isn't a long walk, at maybe only a couple of hundred yards. In fact walking down into the bay, is quite a good idea. As it will then give you the opportunity, to shoot the Sea Stacks from various elevations, as you shoot your way down the cobbled road and down to the old harbour below. Once down in the tiny harbour and looking out at the Sea Stacks from sea level, as shown in SHOT 8 to the right at mid tide. You will be able to see there are in fact two separate Sea Stacks, which are referred to locally, as the "Little Clett". Which is thought to be derived from an old Norse word, meaning 'rocky outcrop' or 'ledge'. On one of the days I was down in Brough Bay, taking SHOT 8 shown on the right. The light was changing constantly, due to a large snow storm working its way towards me, as it passed over the island of Orkney. Which is the thin ribbon of land you can see, on the distant horizon. And which was really adding some drama into the sky, which I was really enjoying photographing. |
 |
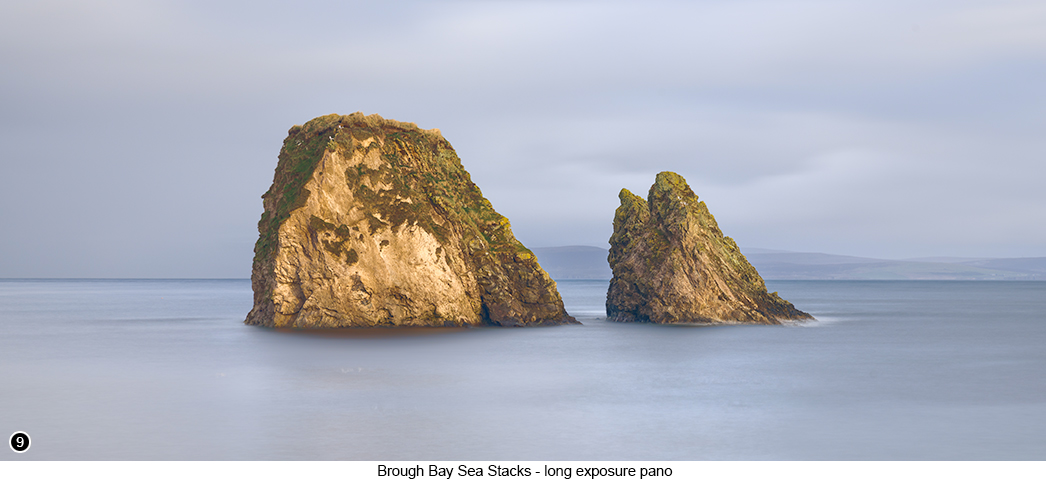
But which unfortunately hit us with full force, only a few minutes later and immediately made us high tail it out of there. As we didn't want to get stuck down at the bottom of the cliffs, as the old cobbled track up to the main road, began to quickly turn into a snow covered nightmare. So I suppose my TIP for Brough Bay is: If you intend to go here in winter, then you have to keep your eye on the weather, so you don't get stuck. As well as the fact, there is little to no phone reception at the bottom of the bay. And even if you could get through to the rescue services, they probably wouldn't be able to get down here to pull you out. I then returned to the Brough Sea Stacks at high tide, as shown in SHOT 9 below. So I could capture the stacks surrounded by water and shoot them with a longer exposure. |
|
|
|
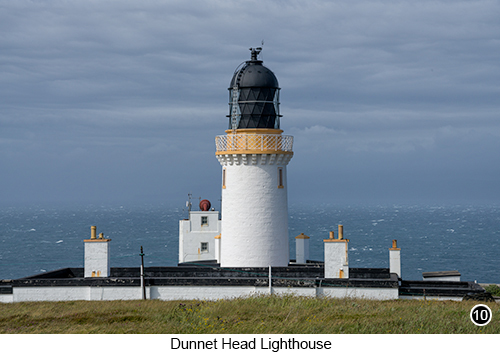
Dunnet Head Puffin Viewpoint and the Dunnet Head Lighthouse : The only reason there is a well maintained road up to Dunnet Head and the amazing views out across the Pentland Firth. Is due to the Dunnet head lighthouse and the need to maintain it, as shown in SHOT 10 below. Yet this road also gives us unfettered access, to the sheer cliffs of Dunnet Head, right next to the lighthouse and the amazing amount of seabirds, that choose this location, to raise their young in late spring. So if you are a keen birder, or you would like to try your hand at wildlife photography. Then this is definitely the location for you. The Dunnet Head peninsula, runs from East to North along the Pentland Firth. And if you are here on a a clear day, you can easily see the Hebridean island of Stroma to the East and the "Old Man of Hoy" on the Orkney islands to your front right. |
|
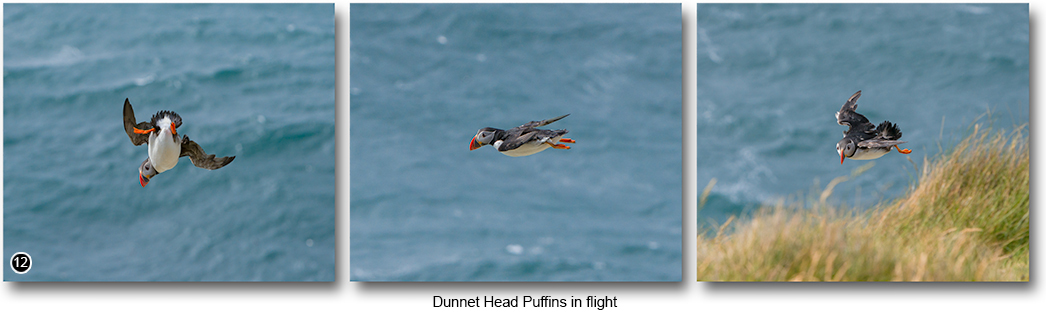
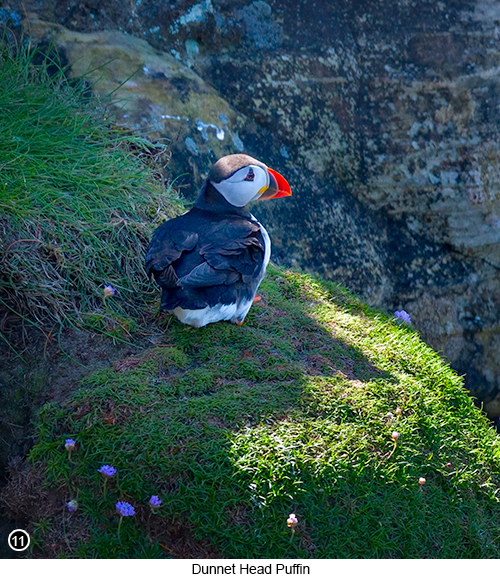
To get to the next location on this photographic guide and the Dunnet Head viewpoint. Retrace your steps back up out of Brough Bay and back to the B855 and keep to the right, Street View, Map View. Now continue driving for another three miles North, along the B855, heading towards the Dunnet Head Lighthouse, Street View, Map View. And continue driving all the way too the end of the road. Where you will come to a large official car parking area and park wherever you can in there, Street View. If you go into the official parking area, you have to pay a fee, via a ticketing machine. But if you park on the spare ground outside of the entrance gates (as you will see that many people do), then you don't. But by going into the car park and paying, you are supporting the upkeep of the area and helping towards wildlife conservation etc. Then having parked your vehicle. Walk down the path, at the far end of the car park nearest to the lighthouse, as shown in SHOT 10 to the right. Then down towards the viewing area, next to a stone wall. To a view of Puffins fly past right in front of you. As well as the many other types of birds, you will see here, Street View. Tip: as I have said several times before in previous chapters, I am not a wildlife photographer and nor do I claim to be. I do not practice it, or even go out looking for images of this type. But the pickings are so easy at this viewpoint, I thought what the heck. I'm here, the Puffins are here and I might as well dust off my old 150-600 lens and give it a go and this is the result - which I hope you agree, isn't too shabby? |
|
So if you are like me and have no particular interest in wildlife photography. But are also like me and own a rarely used long lens, such as a 400mm or above. Then this really is the place to dust it off and put it to good use. Because if you are here at the Dunnet Head viewpoint, at the right time of year (mid to late spring). Then you really cannot miss and are pretty much guaranteed to walk away with something, that will put a big cheesy grin on your face. Which means, if an old duffer like me, can take shots like those shown below, in SHOTS 11 and 12, then you can too. And best of all, you are going to be working only a few yards away from your vehicle. So no heavy lifting, or slogging for miles across open terrain, carrying a huge backpack stuffed to the gills and weighing an absolute ton. |
|
 |
Tip 2: from my limited experience, I have found for myself at least, it is better to use all manual settings for shooting birds, except auto focus and image stabilisation. You see the thing you need to remember when shooting birds - and as I say, I am not a wildlife photographer. Is that you need to shoot them with a really fast shutter speed, of say 1/1000th to 2/000th of a second or more, if you want to freeze them in motion. Which means you will need a lot of light bouncing around the scene to achieve this. Such as you get on a cloudless, bright sunny day - which again is the antithesis of landscape photography and is probably why I don't do much of this type of work. You also need to bump up your ISO, to help you to achieve these high shutter speeds. To what for me as a landscape photographer, are uncomfortably high settings, of at least 800 to 2000 ISO or more. So the brighter and sunnier the day is when you are here, the better for this type of work and the lower the ISO you can get away with. You should also underexpose your shots, by 1 or 2 stops, if you want to capture the highlight details of the birds. As white feathers will blow out completely, if you rely on your camera's metering alone. Which will try to even out the light across the entire scene and not expose for the highlights, if you use auto metering - unless you set it up for centre weighted metering and are able to focus on their brightest parts first. You could also put your camera, into bird mode subject detection with eye tracking, if your system supports it. But which may be called something else on your camera. And, if you like your backgrounds to be smooth and blurry, but with the bird sharp in the centre of the shot, to emphasis its detail? Then you should try to track along with your subject, as it passes through the scene in front of you. Which basically means, spotting a bird coming into your shot from the side. Then focusing on it, as you track your lens along with the speed of its flight. With your burst mode, high speed shutter option turned on, as you to try to track along with it. However, if you are not comfortable going with all manual settings? You could try setting your camera to "aperture priority" mode. With an aperture, of something like f/4 or f/5.6. As well as using your auto ISO setting. To compensate for the changing light levels, if you are struggling to cope with the elements. Such as moving clouds, overcast conditions and intermittent rain etc. |
But most of all when you are here, is just to have fun and enjoy seeing so many different types of birds, flying so close in front of you. Because if I am honest and you are like me, then you will probably miss at least ten times more shots than you capture. So expect to take hundreds of shots, with the hope of getting perhaps only two or three good ones, out of the entire day. And that's if you're lucky!!! You can also walk out along the edge of the cliff at this point and beyond the main viewing platform. While scouting for your bird shots, as you watch them come into land. But the edge of the cliff here has no fence and is a sheer, 300 foot drop, to the jagged and very unforgiving rocks below. Which means walking along the edge of the cliff here, is an extremely dangerous thing to do. So I am advising you not to do that, even though you will see lots of people and photographers who are. |
|
|
|
--Exif information for each of the numbered shots shown throughout this chapter <--- The reason why the dates shown below, appear to span over several weeks, is because I visited these locations at slightly different times over the years ---> --1 - Canon EF16-35 f/2.8L USM, 1/50 Sec, f/16, ISO 200, Focal Length 35mm (-/+ three shot 2 stop bracket), taken on 10th Jun at 18:29 --3 - Canon EF16-35 f/2.8L USM, 1/400 Sec (-/+ three shot 2 stop bracket), f/16, ISO 200, Focal Length 16mm, taken on 12th Jun at 14:27 --5 - Canon EF16-35 f/2.8L USM, 1/200 Sec, f/14, ISO 100, Focal Length 21mm, taken on 10th Jun at 15:23 --8 - Canon EF70-200/2.8L IS USM, 1/80 Sec, f/8, ISO 200, Focal Length 165mm, taken on 4th Dec at 13:52 - 9 - Canon EF70-200/2.8L IS USM, 1/80 Sec, f/8, ISO 200, Focal Length 165mm, taken on 5th Dec at 09:17 --11 - Sigma 150-600mm F5-6.3 DG OS HSM | Sports 014, 1/1000 Sec, f/8, ISO 800, Focal Length 600mm, taken on 10th Jun at 13:47 |
|
If you have enjoyed reading these 'Extra' chapters to my Guide Book and think you might also enjoy reading 79 more chapters across 270 pages, that also includes more than 340 Fine Art quality images, along with detailed descriptions and large scale maps to guide you to the exact location of where I took each and every one of them and which then goes onto discuss the techniques and tools I used to process them, but where everything is written in plain easy to understand English? Then please consider buying the Book. |
 |
 |
|