The Outer Hebrides (now called the Western Isles) from Top to Bottom - Part 2 of 3 The Isle of Lewis and the Standing Stones of Callanish |
It is said by historians that the name 'Hebrides', is derived from the ancient Latin word of 'Hyperborea', which translates into English as 'The Far North' and is how the early Roman explorers who first encountered these islands and its people in 50 BC, used to describe this archipelago situated just off the North West coast of the Scottish mainland. It is also known that the Outer Hebrides had become fully settled and inhabited, 8,500 years earlier during the Mesolithic period, after the discovery of charcoal debris in peat samples that could be dated back to that time. These charcoal fragments also proving, that as the first settlers began to arrive on the islands, they soon began to systematically burn down most of the indigenous woodlands, to create more space for their livestock to graze. In ancient folklore it is said, that these islands are home to the 'Cu Sith' (fairy dog), who are large, have no eyes and glow eerily in the dark. And where it is also said, that if you see one of these fairy dogs running across a beach towards you, that if you are able to keep your nerve and stand your ground, that at the very last moment as it lunges up at you, it will evaporate into a cloud of cold mist and leave no evidence of its existence, other than the last few dozen of its oversized paw prints in the sand. |
|
 |
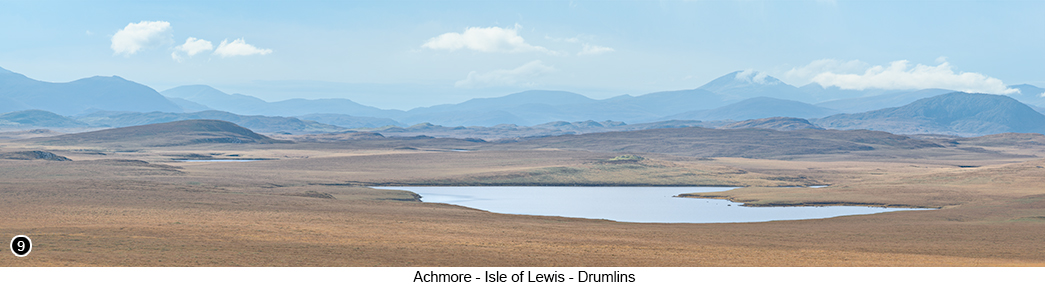
Then keep following the A859 for for another 35 miles or so, until you arrive at a junction with the A858 heading towards the East of the Island on your left, Street View, Map View and take the A858. You are now about 15 miles from Callanish ahead of you, but keep an eye out on your left for a great view across open moorland dotted with lochans and an horizon full of low round topped hills, which in Scotland are known as 'Drumlins', as shown in SHOT 9 below, Street View, Map View. |
|
|
|
So after shooting the Drumlins, continue along the A858 towards Callanish, until you come to an unnamed turn off on your left, Street View, Map View and take this road to continue North. You are now getting very close to the main stone circle and should soon be able to see it on the top of a low lying hill in front of you. But before you get to the main stone circle and lose yourself in the atmosphere that seems to continually surround it, there is also what remains of another smaller stone circle on your left - there are actually quite a few other stone circles in this area you can walk around and photograph, but this one is easy to access and very much worth investigating with your camera. So think of this one as small but enjoyable aperitif, that will help to whet your appetite before you get to the main Callanish Standing Stone Circle, Street View, Map View. For SHOT 10, as shown on the left, I got in as close as I could to the main stone of this particular circle, so I could isolate it from its neighbours, who are not nearly as photogenic in my opinion. I then moved around and up and down etc., until I could find an angle that allowed me to emphasise the contrast of light and shadow along its edges, to make it stand out from its background. Now in the previous chapter, I introduced the idea of trying to incorporate 'Gesture' into your work and how powerful it can be if you do. So I started to wander around the stone with my camera looking for the best angle, when it struck me that from a certain position, it looked a lot like the fin of a killer whale sticking up out of the sea, with the blades of grass surrounding its base, similar to small waves lapping around it and which then gave me a narrative I could work with. So all I then needed to do, was to concentrate on shooting it in a way that would emphasise that narrative. So if you can now see the fin of a killer whale in this shot as well, then I have achieved my goal and incorporated 'gesture' into the shot, because as Minor White once so eloquently put it, "One should not only photograph things for what they are, but for what else they are." |
 |
|
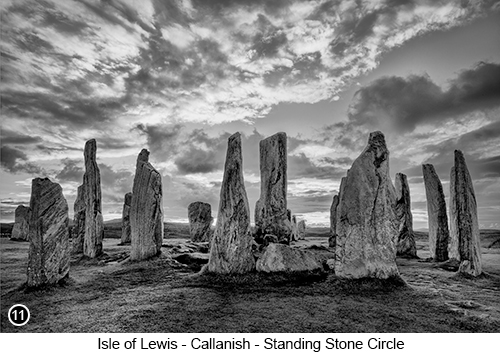
Then having finished with the first stone circle, get back onto the unnamed road and continue on down the hill towards the main stone circle and the visitor centre. But before you reach the visitor centre car park, there is a much better place to park in my opinion, hidden away up a small hill next to some houses, Street View, Map View, but which leads to quite a large parking area that sits right next to the main stone circle at Callanish, Street View, Map View. The standing stones at Callanish are an amazingly atmospheric place to visit and as I have already mentioned, there are also what remains of quite a few other stone circles in this area, apart from the main one shown above right and below in SHOTS 11 and 12. Some are better preserved and more photographic than others, but they all have an appeal and a visual impact that is rarely to be found anywhere else in the world and are well worth exploring. So I would strongly advise that you allocate to yourself as many hours of shooting time as you can at this location, because these stones look good and very photogenic under pretty much any weather conditions and at any time of the year. Another good thing about these standing stone circles and the photographic opportunities that they will give you, is that they are fully open and freely accessible to visitors and photographers all year round without any restrictions, which really is something of a rare treat with such historic monuments these days. The Callanish Standing Stones are all made from local Lewisian rock and archaeological excavations have shown that this main Stone Circle was erected around 5,000 years ago. It originally consisted of an 11.4 meter diameter outer circle made up of 13 stones, which surrounded the central seven tonne 4.8 meter high monolith stone. The first known written reference to these stones was by a local man called John Morisone, who around 1680 wrote about the stones as being the remnants of a tribe of giant men called ‘Fir bhrèige’ (meaning "false men" in English), who were petrified into stone by an enchanter to stop them terrorising the land. And that early on midsummer's morning, a ghostly entity known as the "Shining One" can be seen walking around the circle, as he checks that each of the giants remains locked under his spell, with his coming being heralded by the call of a cuckoo. It has also been suggested that these stones were in fact a very clever prehistoric lunar observatory, which the local farmers created to gauge what time of year it was and when would be the best time to plant their crops etc., as well as also being used, as a gathering site for a variety of other ceremonial rituals and pagan celebrations. Having now finished our tour of the Isles of Harris and Lewis and after visiting many of the photographic opportunities that can be found there, I am going to take you further South as we now begin to island hop our way across the rest of the Outer Hebridean Archipeligo. So to do this you will first need to retrace your steps back South, by rejoining the A859 and returning to the ferry terminal village of Tarbet. But then having arrived back at Tarbet, continue on past the village along the A859 and then further on, towards a second and smaller ferry terminal situated in the village of Leverburgh on South Harris Street View, Map View, and where you can then board the ferry to North Uist. This second ferry journey between the two main islands, last for around 60 minutes and will take you on a very enjoyable tour, past many of the smaller inhabited and uninhabited islands that sit around the edges of the archepeligo, with lots (and I do mean a lot..) of stunning views all along the way, as well the chance to observe the abundant wildlife that can often be seen in these waters. From whales and basking sharks, to Stormy Petrols (the later being a rare bird by the way) and even large turtles, until you finally disembark at the North Uist ferry terminal situated in the tiny village of Berneray on the Isle of North Uist. |
|
 |
|
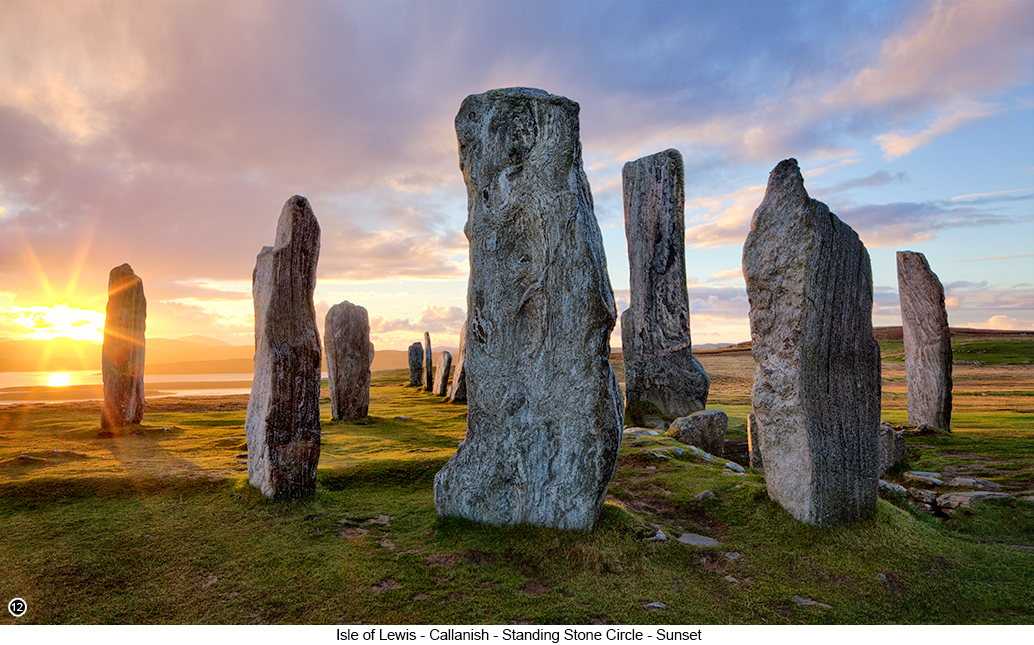
Tip 1 - try to be here on or around a time of year when the sun sets at exactly the same time that most people (none serious landscape photography folk like you and me that is) are heading back to their guest houses and hotels for their evening meals, because the stone circles at Callanish are very much a visitor hotspot these days, or as near to one as you will ever encounter in such a remote location as this. There is even a large coach park area to the side of the purpose-built visitor centre at Callanish, which is used to bus hundreds of people into the area to walk amongst the stones. So to get a successful 'clean' shot of the stones at sunset (and it really is a sunset location), without anyone standing in your way, or moving around in front of you with their brightly glowing iPads and phones held out at arms length, as they take a seemingly endless array of selfies stood right in the middle of the circle, is going to be difficult to say the least. That is unless you time it just right to be here and setup ready to shoot, when the sunset will take place between 18:00 to 19:00 and when most visitors are either eating their evening meals, or being transported back to their hotels. I have nothing against people milling around and enjoying the stone circles by the way, or taking their selfie shots posing to the camera etc, as the standing stones at Callanish are a worthy global attraction and I would advise everyone to visit them at least once in their lives, in fact the more visitors the merrier for the local economy I would say. But if you want to get your shots of the standing stones at sunset, free from the clutter of people and the annoying things they will get up to, especially once they see you setting up with a tripod, then you can, but only if you are prepared to put in a little bit of preplanning and preparation. Tip 2 - If there are still a few people milling around just when the setting sun is doing its thing and you have already chosen your spot and your camera is setup on your tripod and ready to go, then don’t get annoyed, but just keep taking lots of shots, but without moving your camera or changing any of the settings. Because as people move around, they will cover and then reveal different parts of the scene, so if you capture enough images under similar lighting conditions, then all you need to do is load all your images into a stack of layers in Photoshop (from bridge highlight all the images from the same scene you wish to blend, then select ‘Tools - Photoshop - Load Files into Photoshop Layers’), then mask out the people from each layer, layer by layer, until you have a final shot without anyone standing or moving around in the middle of it. Tip 3 - Try to find a shooting position, where none (or at least as few as possible) of the edges of the stones are touching, as you look at them through your viewfinder, because by incorporating a breathing space between each of the subject elements (this also works for trees or any other collection of vertical structures such as ships masts etc), no matter how small those breathing spaces are, will allow you to separate out all the main elements within your image - as shown above. Doing this makes the image feel much more comfortable and less cluttered to the people viewing it, if they can more easily identify and then separate out each individual element within the scene. Trust me, this is one of those small and relatively easy things that you can incorporate into your work, but which is pretty much guaranteed to have a huge impact on both the design and quality of everything you create, yet will often take you only a few extra moments to achieve. |
|
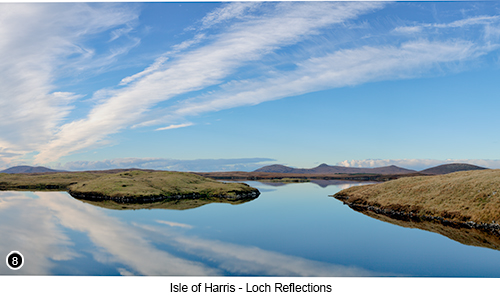
--Exif information for each of the numbered shots shown throughout this chapter --8 - Canon EF24-105 f/4.0L IS USM, 1/60th Sec, f/16, ISO 100, Focal Length 45mm (7 shot vertical pano), taken on 19th Oct at 16:39 --10 - Canon EF24-105 f/4.0L USM, 1/45th Sec (-/+2 bracket), f/22, ISO 100, Focal Length 35mm, taken on 15th Oct at 12:36 --11 - Canon TS-E24mm f/3.5L II, 1/200th Sec (-/+2 bracket), f/11, ISO 100, Focal Length 24mm, taken on 15th Oct at 17:38 --12 - Canon TS-E24mm f/3.5L II, 1/100th Sec (-/+2 bracket), f/20, ISO 100, Focal Length 24mm, taken on 15th Oct at 17:50 |
|
If you have enjoyed reading these 'Extra' chapters to my Guide Book and think you might also enjoy reading 79 more chapters across 270 pages, that also includes more than 340 Fine Art quality images, along with detailed descriptions and large scale maps to guide you to the exact location of where I took each and every one of them and which then goes onto discuss the techniques and tools I used to process them, but where everything is written in plain easy to understand English? Then please consider buying the Book. |
|