The Hebridean Islands of Harris and Lewis - Revisited (part 2 of 2) |
Continuing on from part 1, of this photographer's guide to the Isles of Harris and Lewis, to part 2: You might find it interesting to know, that the Isles of Harris and Lewis, are not two separate islands as the name would suggest, but are in fact one island and one single land mass. With an imaginary boundary between the two Isles, running between Loch Resort on the west coast of the island and Loch Seaforth on the East. The isles of Harris and Lewis, or Lewis and Harris, as the names can be used together correctly in either orientation (also known locally in Scottish Gaelic as: "Leòdhas agus Na Hearadh"). Was indeed originally named as being one island by the first settlers, who called it "an t-Eilean Fada". The island of an t-Eilean Fada, is now known to have been settled around 6,000 years ago, due to the many stone monuments, structures and burial cairns etc., that have since been discovered dotted around the island. The oldest of which, being archeologically dated back to the late Neolithic period. Yet the reason why the one island of "an t-Eilean Fada", eventually became known as the two separate Isles of Harris and Lewis, is still not fully understood. Especially as the entire island for most of its known history, remained under the rule of a single clan, the Clan Macleod. So perhaps it could have been due to a family feud, or perhaps happened when the island was first invaded by the vikings around 900 years ago, or even when christianity first appeared on the island 500 years ago. But for whatever reason, today this single island, is known as the two separate Isles of Harris and Lewis, with the much older name name of "an t-Eilean Fada", no longer in use. So continuing on with this photographer's guide, around the Isles of Harris and Lewis: keep driving North from the Seilebost beach area on the Isle of Harris, for just a few more miles. As you continue to pass by, yet more amazing coastal views and white beaches on your right. Until you reach a wide flat area of beach and tidal wetland on your right, that is really for bird watching and wildlife photography. Then keep going for a few hundred yards further, until you come to a flat, rough piece of ground, right next to a stretch of metal Armco barrier on your right. Where you will find, there is plenty of room to park a couple of vehicles off the road and park here, Map view, Street view. |
|
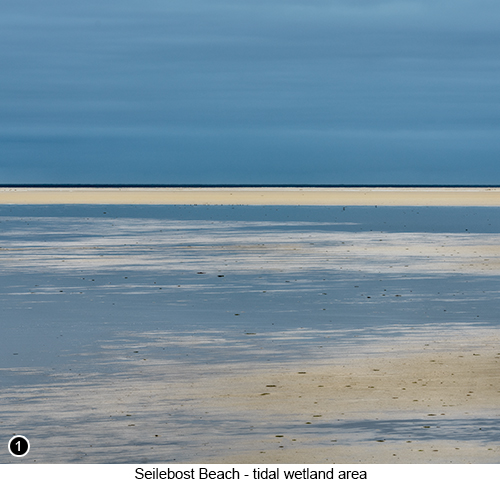 |
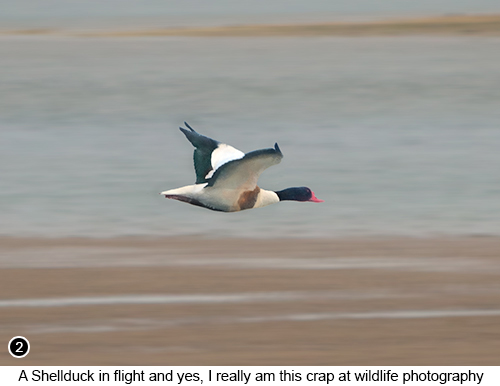
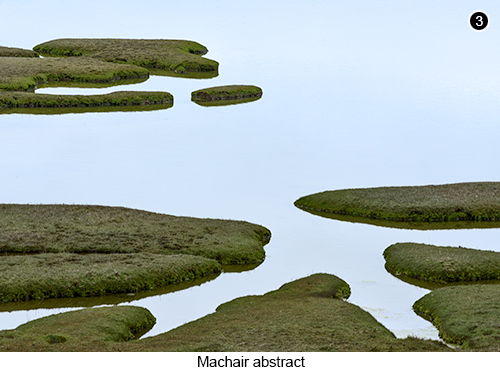
This unofficial car parking area, sits in a not too deeply potholed area of well used ground, that at first sight, does not look to be very wide at all. Yet is still easily wide enough, to accommodate a couple of SUV sized vehicles. So if there is no one parked here, you should have absolutely no trouble, parking even quite a large sized vehicle here safely. But obviously you will need to make sure, the rear of your vehicle is not sticking out into the road and oncoming traffic. By tucking your vehicle right up to the edge of the grass, nearest to the side of the loch. We found the best time to be here for wildlife watching and photography, was at low tide. When the whole basin had completely drained out, but that always seemed to leave several large pools of water, sitting on top of the sand, as shown in SHOT 1 on the left. Where flocks of birds, would congregate in large numbers to feed. If you have brought a flask of tea or coffee with you (and if not why not?), then this is a really good spot to enjoy some refreshment, as you watch the wildlife feeding and then try to name all the different types of bird, that you are going to see here. OK, I did think it might be a good idea to grab a shot of a bird in flight for you, as shown in SHOT 2 below. But wildlife photography just isn't my thing and I know, it shows in the shot below. But for you folks out there who are into bird and wildlife photography, then you will definitely enjoy yourself at this location. And if I am going to allow myself an excuse or two, as to why I am so bad at wildlife photography? Well the first thing I would say, is I am not really geared up for it, nor do I practice it, nor does it float my boat. Which means that me having taken anything at all to show you, is akin to a miracle. So hey, stop your laughing at the back there! Then, after shooting the wildlife at low tide, continue on the A859 heading in the same direction, for another few miles or so, until the roads starts to bend around to the left, as it then begins to head inland and up a slight incline. You will then come to a small area of salt marsh and open water on your right, Map view, Street view. That has lots of little green islands in it (commonly known as Machair in Scotland), surrounded by unusually shaped reflective pools. |
| This area of Machair, as shown in SHOT 3 below, is a subject that I didn't find easy to photograph, but that kept grabbing my attention every time we drove past. As it always looked amazing and had so much potential, for creating lots of weird looking abstracts. So definitely worth your time to explore. And even if you don't walk away with any worthwhile shots of this tiny marsh, you will certainly have a lot of fun trying. Also these tiny little Machair islands, seem to have formed in such a way close to the edge of the loch, that they continually interrupt the flow of any small ripples on the water. Which means they are nearly always surrounded by reflections - or at least they were whenever we drove past them and we drove past them several times each day. So having now taken your shots of the salt marsh Machair abstracts, continue up along the A859 heading further inland. Where the road continues to climb slowly into the island, then passing through a small village call Leverburgh and then on towards the village of Rodel around 13 miles further on. Once you get closer to the St Clement's Church at Rodel, you will see a turn off to your right, that looks as though it is signposted for where the church entrance will be. But it isn't and instead just takes you on a small detour around the back of the church. So ignore it and continue driving on the A859 a little further, as the road now starts to bend slightly to the left. You will then arrive at the actual entrance to the church and the grounds that surround it on your right, Map view, Street view and park here. You will find there is plenty of room, to park several vehicles next to the church wall. So having found somewhere to park, throw on your wide angle lens, grab your tripod and cable release. Then head towards the entrance of the old church and go inside, through a really old wooden door. |
 |
 |
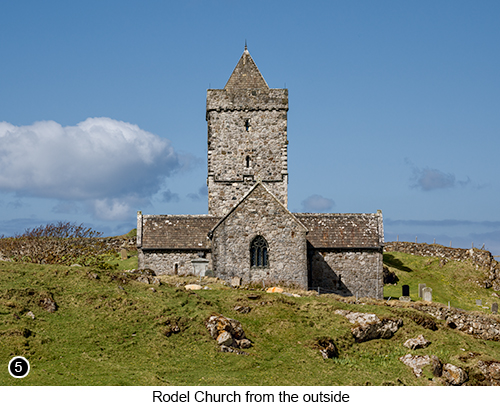
The church grounds are always open throughout the day and where you can walk around to take pictures of it unrestricted. But I found that being so close in to the building, I couldn't get anything from the outside that I liked. So I went inside the church to photograph it from in there, as shown in SHOT 4 below. You will find that it is very dark in the old church, with only a few small windows to let in the light. Hence why I suggest you take your tripod and cable release with you, as you are probably going to be making exposures, several seconds in length. You might also need to bracket your shots, especially if it is a bright sunny day and you intend to include any of the small, ornate, stained glass windows in your compositions. However I did handhold my camera, for the black and white shot shown below left, of my wife standing directly in front of a window, as she looks down at an old stone tomb. So yes you can get away with shooting handheld in here, but is very difficult and will probably require you, to spend quite some time on the computer working on the file. As the contrast range you will be working with, is going to be huge. So be prepared to expose for the highlights and then dramatically pull up the shadows. But if you are using a camera with a modern sensor, such as any of the ones Sony produces (and even if your camera wasn't made be Sony, the sensor probably was), then you should be OK and able to get away with such extremes of contrast. I then went back out onto the A859 and continued driving on a little further, until I came to a viewpoint just a couple of hundred yards away, Map view, Street view. Where I could look back and capture the church within its wider environment, using the compressive perspective of my 70/200, as shown in SHOT 5 below. |
Then having parked at the side of the road, I began to walk in towards the church shooting it as I went and trying to frame out any clutter that surrounded it. I also knew I would have to clone out some unsightly scaffolding, attached to the bottom left exterior of the church. As well as to avoid, several electric cables running across the sky in front of it. I also decided to place the church tower, slap bang down the vertical centre of the frame. Simply because it seemed to work better, for balance and compositional weighting, within its surrounding environment. But even as I lifted the camera up to my eye, I knew that SHOT 5 was only ever going to be a 'record' shot. Yet I was still very happy to take it, so I could show you guys what the outside of this beautiful little church looked like and how photogenic it could be, given the right (stormy?) weather conditions. |
|
 |
But when I look at SHOT 4 on the other hand, I do feel as though I was able to capture, the full emotional essence of the scene - you know a bit like with street photography and the 'decisive moment', that every street photographer is always striving to achieve? And with this image on the left, I think I have captured that type of moment. |
But you might look at SHOT 4 above and disagree of course and that's OK, as we all like different things and have different ways of working. But for me, whenever I rate my work from a recent shoot, the question I always ask myself, is would I like to see this image hanging on my wall and be proud to show it, to everyone who visited my home? And for SHOT 4 above, the answer is a definite yes. Oh and just as an aside. When I took the SHOT 4 shown above left, of my wife was standing in front of a very old stone tomb, that still contains the remains of a long dead chief of the local clan. Yet I didn't notice when I was looking through the viewfinder, how the light coming through the window, was passing directly through the gap in her legs and how it was lighting up and removing the shadows, from the stone flooring immediately surrounding her feet. But which I did begin to notice, as I worked on the image several weeks later and how this trick of the light, was making it look like she was floating on air - spooky or what..? I could go on to say, how I always knew that she was an angel, but that might be a bit too romantically mushy and gooey eyed for you to stomach, so I won't. |
|
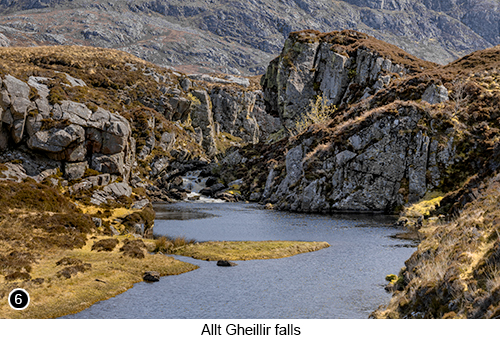
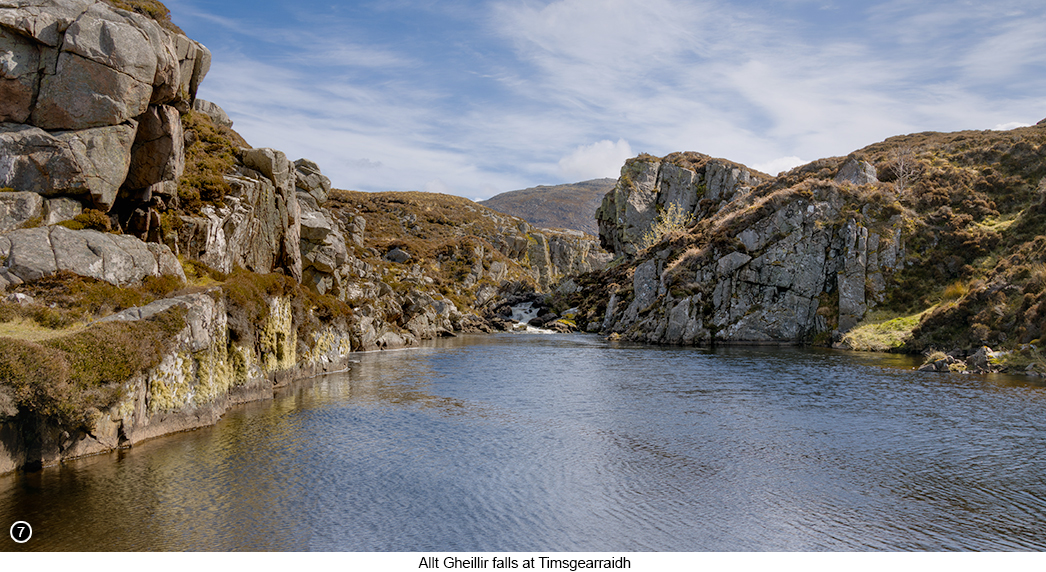
I am now going to take you much further up the island and onto the Isle of Lewis, to photograph the amazing Mangersta Sea stacks and the standing stones at Callanish. But first, I am going to take you to the little known Allt Gheillir falls at Timsgearraidh, as shown in SHOT 6 to the right. Which is certainly worth a look with your camera and perhaps an hour or so of your time. If for no other reason than you are going to drive past these falls anyway and they look so pretty, sitting right next to the B011 road. So continue heading North on the A859 for 38 miles, until you reach a left turn onto the A858, Map view, Street View and turn left here. Then continue driving for another 5 miles or so, until you reach a turn off for the B011 on your left in the village of Garrynahin, Map view, Street view. Then continue driving for another 18 miles, until you reach a large, official, but totally unmaintained car park on your right, Map view, Street view. That is situated just in front of a modern concrete bridge and park here. You will still not be able to see the falls just yet. So walk towards the bridge and then across the road, as you keep an eye out for fast moving vehicles, coming at you from both directions. This stretch of road has an unrestricted speed limit and is far away from any populated areas. So the young guns who live near here, enjoy nothing more than driving down this road at high speed. You will then see the falls, as well as a small abandoned fisherman's bothy up the hill to your left and the tiny but pretty, Allt Gheillir falls straight in front of you. |
 |
 |
|
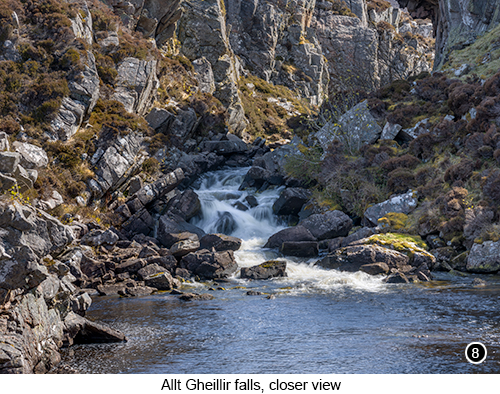
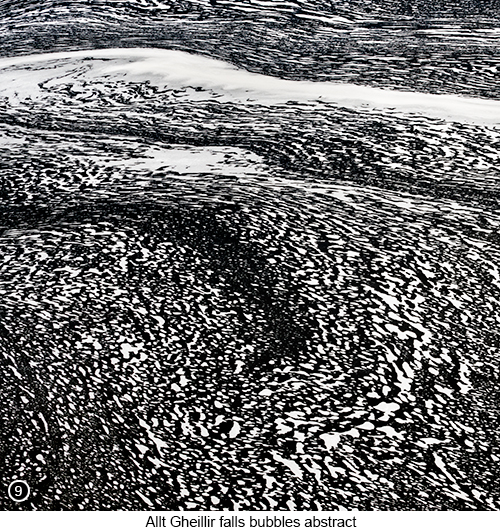
| You will also see there is a lightly trodden path that leads down to the falls and a small piece of flat land, that sticks out into the river, as can be seen in SHOT 6 above. So with a medium length zoom mounted on your camera (24-105?). Set off down the path, heading towards the small piece of land that sticks out into the lochan and set up there. As you can see in SHOT 7 above, I went for a cropped pano shot of this scene. As I thought this was probably the best way to show you, all the most interesting features across the full width of the view. I then zoomed into the falls as far as I could, for a more intimate view of it, as shown in SHOT 8 below left. Then having taken my shots of the falls from this particular vantage point, I continued along the path to the left of the lochan, to a slightly higher point overlooking the main pool of water nearest to the falls. Where as soon as I arrived there, I could see directly below me, how there was a long, wide stream of bubbles, moving along with the water the falls were creating and how these bubbles, were making lots of interesting patterns, as shown in SHOT 9 below right . So as soon as I spotted this, I seemed to lose the plot and spend the next thirty minutes or so, shooting lots of waterfall bubble abstracts - yes it really was turning out to be quite an abstract photographic holiday for me wasn't it? |
|
Then after shooting the falls, continue driving North along the B011 for another 10 miles or so, until you reach an old, abandoned, flat topped group of single storey building on your left, just past a cattle grid crossing this single track road, Map view, Street view. And park wherever you can here, that does not block off the track up to the buildings. You are now going to walk in the last half mile or so to the sea stacks, as there is absolutely no where to park nearer to the stacks - and as you know, you are not allowed to park in passing places, as they always need to be kept open, to allow people to drive past each other, on these small single track roads. |
|
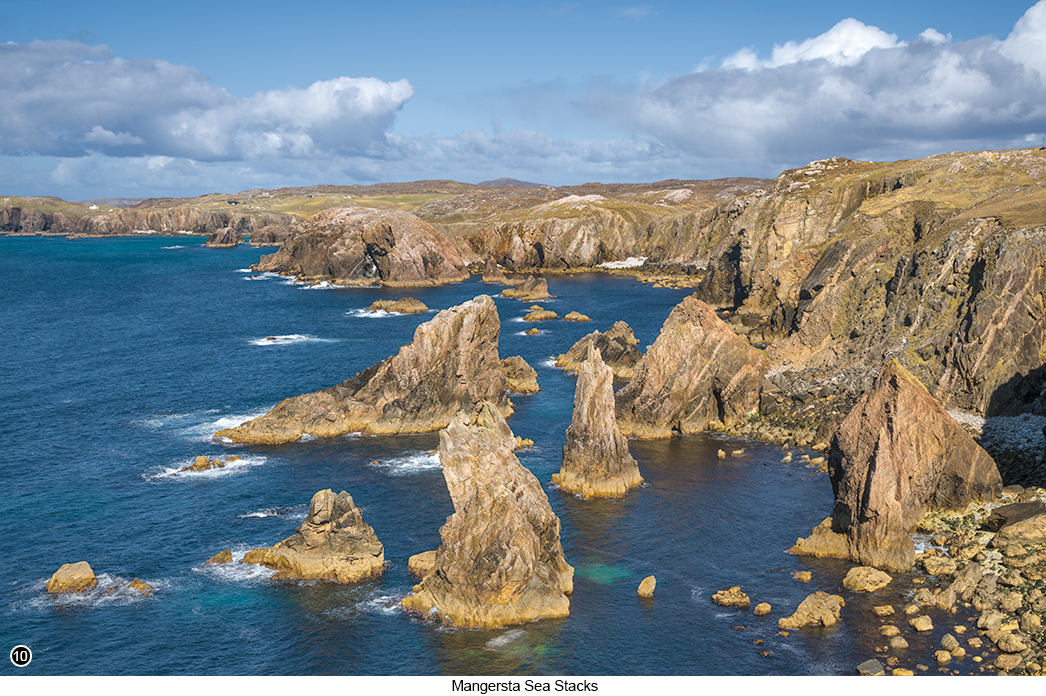
The walk to the sea stacks is easy and flat, so shouldn't be a problem, even if you are carrying a lot of gear. Which you might not need to carry anyway, as you are probably going to be hand holding your camera and using a mid range 24-105 zoom for this shoot. Which focal length range, seems to fit perfectly with the width of the view at this point, as shown in SHOT 10 below. So even though I would suggest that you still take your tripod along with you, as well as a couple of other lenses. Unless you are really lucky, you will find that the strength of the wind, coming over the cliffs tops towards you, is going to be very strong indeed. So shooting hand held, may be your only option here. Although I have seen shots of the Mangersta Sea Stacks, where the stacks are surrounded by calm semi reflective waters. Which does mean that calm conditions and long exposures are possible here. But when we were here, I would guess the winds were easily gusting up into the range, of between 40 to 50 miles per hour. Which made it quite an interesting challenge to work with I can tell you and a very memorable experience for us both. As we spent most of our time on these cliffs, trying to not get blown out to sea. |
|
 |
|
So continue down the road in the same direction, but now on foot, until you reach a point, where you can clearly see the top edge of the cliffs, on the far side of a flat, rocky, open area of moorland, Map view, Street view. Now step off the road at this point and walk across the moor heading towards the right edge of the cliffs. As you try to keep to the rockier areas of the moorland, so as to avoid sinking knee deep into a peat bog. Then once you are at the cliff edge and looking out at the sea stacks, it is simply a matter of trying to frame up your best compositions, by moving along the edge of the cliffs as you shoot - but not too close to the edge of the cliffs, eh? I think the best conditions for photography at this location, would be just after rain, but when the wind level is more like a breeze. So that the sea stacks look wet and contrasty against their background and you can work the scene in which ever way that you want. But whatever the conditions turn out to be when you are here (other than horizontal rain and/or during a hurricane of course), I know you will really enjoy photographing this view. |
|
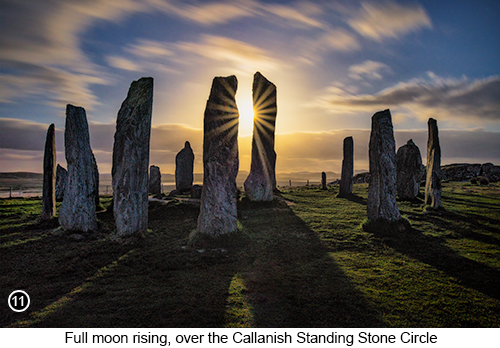 |
I am now going to take you to the final destination, of my photographic tour around the Isles of Harris and Lewis. To one of the most atmospheric locations, you could ever hope to photograph in Scotland and to a place where you may have the chance to create, an image you will want to hang above your settee (couch in the US). So first of all retrace your steps, all the way back to the A859 and then continue heading North for another 10 miles or so. Until you eventually reach the village of Achadh mor and a signpost on your left, pointing to the A858 and where the road then turns into the A858 - so basically, carry straight on here, as you now head towards the village of Gearraidh na h-Aibhne, Map view, Street view. Then continue driving on for another 12 miles, until you reach a turn off on your left, that is signposted for the Callanish Standing stone visitor centre and turn left here, Map view, Street view. Keep driving just a couple of miles further, where you will finally reach the Standing Stones area of Callanish. But just before you reach the main visitor centre, you will see a small turn off on your right, that goes up up a short, steep hill, Map view, Street view. Turn right here and drive up the hill, to a large parking area, located right next to the standing stones, Map view, Street view. If you now walk over towards the stones, you will see a rickety wooden entrance gate to your front left, that gives you access to the inside of the fenced off area and allows you to get right in amongst the standing stones. You will then see the main stone circle just ahead of you, sitting on top of a low lying hill, as shown in SHOT 11 to the left. |
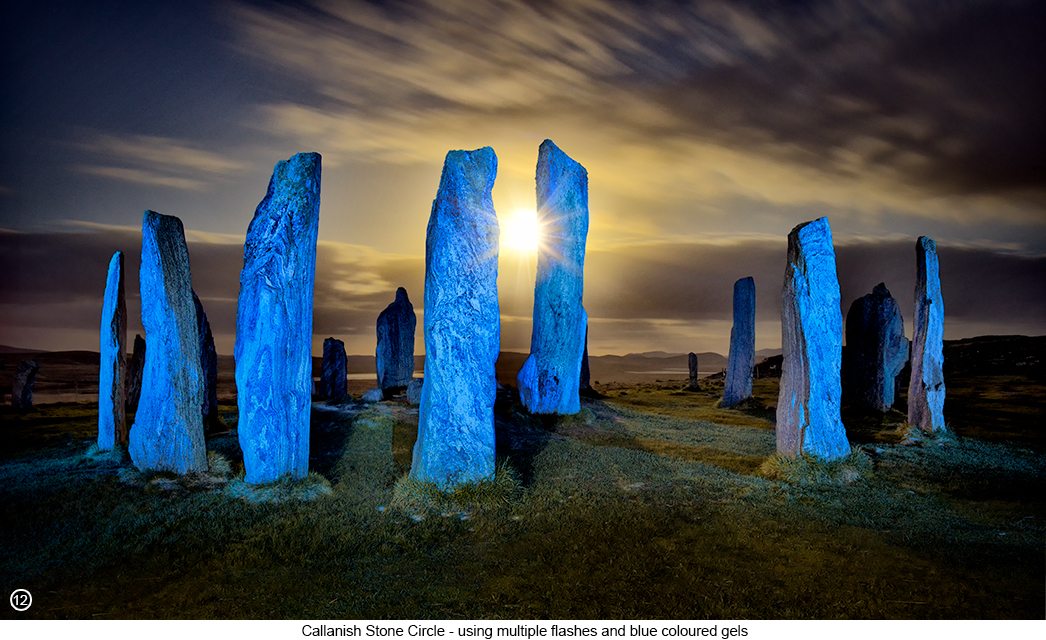
The Callanish Standing Stones, as shown in SHOTS 11 above and 12 below, are known to have been erected on this site around 5,000 years ago, at the end of Neolithic period. Each of these standing stones, are thought to have been selected for their similar shape and size, then erected in a very specific way, that turned them into a permanent solar and lunar calendar. This calendar could be then used by the people who created this structure, to continuously highlight the most significant times of the year, for both ceremonial purposes and farming. Which are thought to have been the summer and winter solstices, as well as the Spring and Autumn equinoxes. This amazingly sophisticated device, has now stood on this site for over 5,000 years and has never changed or been altered through time. Thereby offering us a tantalising glimpse into the distant past, as well as a very atmospheric location to photograph. What is the best time of year, to be here photographing the Stone Circle of Callanish? In my opinion the best time to be here, is outside of the main tourist season in summer, which means any time from early winter through to early spring. But whatever season you do choose to be here, you are still going to have people wandering into your shots. Yet from late October through to late to April, not so many people that they will ruin any chance of getting a clean image of the scene. So even though you are still going to get people walking through the stone circle, you can usually work around them if you have the patience and wait for a lull in the foot traffic. Although this whole area does become a lot less busy after it starts to go dark, especially after the sun has fully set and their smart phones no longer work effectively. Which means you should then have the entire place, pretty much to yourself. But which also means, you will now be shooting it in the dark. But there is a way around that problem and it might just be good enough, to completely blow your socks off..! See below... |
|
|
|
Tip: unless you are really lucky, or you have timed it to be here on a day, when everyone else is doing something more important, such as watching a royal wedding, or the finals of the world cup etc. Then be prepared to stay here working this scene, until everyone has gone home and well beyond the 'blue hour' and into the night. Which if you are a landscape photographer like me, night photography is not something you do very often, or have sufficient practice and skills, to succeed at on your first attempt. So what I advise that you do first, is to watch a seasoned photographer (who you probably already know about), who is willing to show us, how to successfully shoot this type of night scene. And this is where I would like to give a huge shout out to Nick Carver and his youtube videos. Where he explains in great detail, how he took his amazing night shots, of a Saguaro cactus in the Sonoran Desert, by lighting it up using a handheld flash and coloured gels ...and who's idea I totally stole for the shot shown above. Here are the links to the videos of Nick, showing how he worked his night photography magic and in the order that you need to watch them - Sonoran Desert Saguaros part 1, Sonoran Desert Saguaros part 2, Sonoran Desert Saguaros image review. I then used my own variation of Nick's idea, to create SHOT 12 above. But instead of shooting a Saguaro cactus in a desert, I used the idea to shoot the standing stones of Callanish, on a remote Hebridean Island. And I must say, I am very happy with the result. Thanks Nick, your willingness to freely share this information with us all, is very much appreciated! However, being the old curmudgeon that I am, I didn't want to go as high as Nick was willing to go with his ISO settings, because I didn't want to contend with the noise, I knew going above that limit would create. So instead I kept my ISO setting down to 800 and 'light stacked' 3 separate shots back into one. I also knew I would have to do this 'light stacking' technique, because I wouldn't be able to light up the entire width of the stone circle, during one long exposure. Even with multiple firings of the flash and running around like a headless chicken in the dark as Nick did. Which means the shot you see above, is made up of 3 separate shots taken from the exact same viewpoint, but containing nine separate flashes. With 3 flashes being fired off in each of the 3 long exposure shots, as I moved around manually firing the flash, at different points around the stone circle. ..and here's how I did it in more detail. I first made sure that my flash (Canon 580ex) had a fresh set of batteries and then set its beam power to full and with a beam width of 50mm - unfortunately not all flashes have the luxury of allowing you to set its beam width, but this one does. However most non adjustable width beam flashes, will be factory set to around the same 50mm beam width anyway, so it shouldn't be a problem if your flash beam is non adjustable. I then placed two blue coloured gels across the front of the beam and held them in place with a rubber band. I then set up my camera on the tripod and selected the framing I wanted using a torch - you will have to use a tripod for this technique, as your camera cannot move throughout this process. I then set the camera to f/11, ISO 800 and a 30 second exposure, with my 20-105 lens set to 24mm wide. I also used a remote shutter release and set the rear screen of the camera, to preview display mode, so I could see when the 30 second exposure was still firing, as well as when it had ended. I then got my long suffering wife, to stand behind the camera holding the remote and fire it off only when I asked her to. I then walked over to the right side of the stone circle and making sure I was holding the front of the flash, a couple of feet behind the field of view of the lens and pointing it vertically oriented, at around midway up the column of stone furthest to the right. I asked her to hit the release button on the camera, as I fired off my first flash. I then had to wait a few seconds for the flash to power back up again, as I walked a little further around to my left and then fired off a second beam of light and then a third etc., just before the 30 seconds exposure was up. |
|
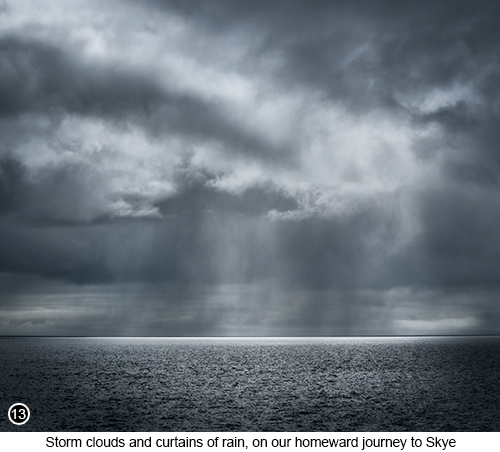 |
I then waited for the flash to power back up again, as I walked nearer to the front centre of the circle and did the whole process again. We then did it one last time, as I moved around to the left side of the stone circle. I then loaded the 3 separate files into Photoshop, as an aligned layer stack and blended them back into the single image, you now see above in SHOT 12. Explanation of what I mean by the term 'Light Stacking' - When I use the term 'light stacking', what I am describing, is like when you have a scene in front of you, that you know the depth of field is going to be greater, than you can capture in a single shot. So you take several shots at different focal points throughout the scene, to blend back into a single focus stacked image on your computer. Well I did something similar to this, but instead of working with different focal points within the scene, I did it with different areas of the scene I was lighting up with a flash. So that the final image as shown above in SHOT 12, would look like the entire scene was being lit across its full width, as well as from many different angles simultaneously. Although I do realise, how I am now making this 'light stacking' technique, using multiple strobe flashes sound easy, but believe me it isn't. As we had to run through this process at least half a dozen times, before we got it to work in the way that I wanted. But we did get there in the end and which I hope you will agree, really was worth the effort. Then at the end of our amazing week on the Isles of Harris and Lewis, as we returned to the Isle of Skye on the ferry. The bright sunny weather we had just left behind, started to change for the worse. With heavily laden rain clouds, beginning to gather along the Western horizon, as shown in SHOT 13 to the left. But which occasionally had shafts of light, still breaking through the curtains of rain. And, as I was already out on the upper deck, with my 70/200 mounted on the camera, just in case anything turned up - with luck always favouring the prepared etc. I started to shoot the weather and take my final shots of the trip. With SHOT 13, being about the best of the crop. |
Exif information for each of the numbered shots shown throughout this chapter --1 - Canon EF70-200/2.8L IS USM, 1/200 Sec, f/11, ISO 100, Focal Length 200mm, taken on 21st Apr at 10:29 --3 - Canon EF70-200/2.8L IS USM, 1/100 Sec, f/16, ISO 100, Focal Length 200mm, taken on 21st Apr at 10:04 --4 - Canon EF16-35/2.8L USM, 1/60 Sec, f/2.8, ISO 250, Focal Length 16mm, taken on 20th Apr at 16:20 --5 - Canon EF70-200/2.8L IS USM, 1/250 Sec, f/13, ISO 100, Focal Length 135mm, taken on 20th Apr at 16:51 --6 - Sigma 24-105mm F4 DG OS HSM | Art, 1/8 Sec, f/14, ISO 100, Focal Length 105mm, taken on 25th Apr at 13:08 --7 - Sigma 24-105mm F4 DG OS HSM | Art, 1/200 Sec, f/14, ISO 100, Focal Length 38mm (cropped pano), taken on 25th Apr at 13:17 --9 - Sigma 24-105mm F4 DG OS HSM | Art, 1/160 Sec, f/20, ISO 200, Focal Length 105mm, taken on 25th Apr at 13:42 --10 - Sigma 24-105mm F4 DG OS HSM | Art, 1/250 Sec, f/16, ISO 200, Focal Length 46mm (2 shot, hand held, horizontal pano), taken on 25th Apr at 15:41 --11 - Sigma 24-105mm F4 DG OS HSM | Art, 30 Sec, f/11, ISO 800, Focal Length 24mm, taken on 23rd Apr at 11:42 --12 - Sigma 24-105mm F4 DG OS HSM | Art, 30 Sec, f/11, ISO 800, Focal Length 24mm, taken on 23rd Apr at 11:06 --13 - Canon EF70-200/2.8L IS USM, 1/640 Sec, f/11, ISO 100, Focal Length 70mm, taken on 28th Apr at 14:31 |
|
If you have enjoyed reading these 'Extra' chapters to my Guide Book and think you might also enjoy reading 79 more chapters across 270 pages, that also includes more than 340 Fine Art quality images, along with detailed descriptions and large scale maps to guide you to the exact location of where I took each and every one of them and which then goes onto discuss the techniques and tools I used to process them, but where everything is written in plain easy to understand English? Then please consider buying the Book. |
|