
Highland and Moray - Part 3 of 3 - Ardtoe Bay A beautiful but hidden away West facing sandy bay, with lots of ice flow shaped rocks, that is rarely visited or photographed |
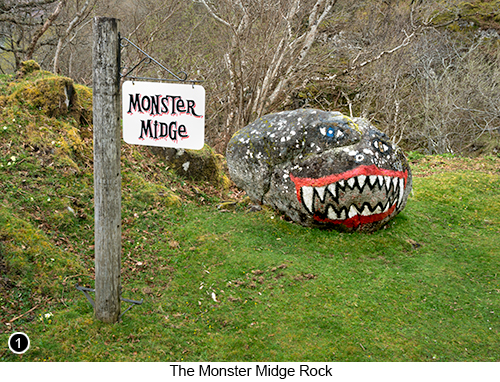
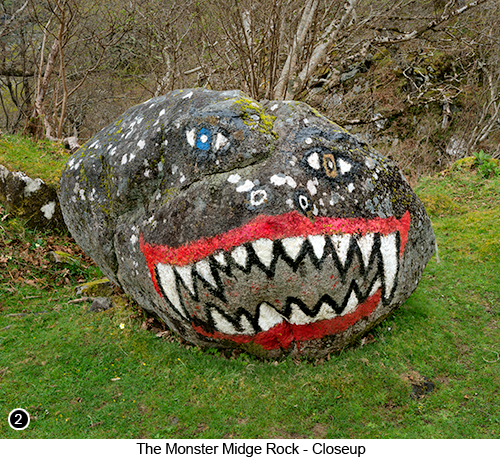
| Here is another one of my more recent photographic location discoveries, that I know has way more potential then almost all of the photographs I am going to show you throughout this chapter. So that is why I definitely intend to return to this tiny, hidden away bay, in an attempt to shoot it during a sunset at low tide and which I am now advising, that you should also consider doing the same. So who knows, maybe I will see you there? Setting the scene: There is a legend (isn't there always in Scotland?) that the area surrounding Ardtoe Bay, is the home of the fearsome Wolf Woman of Ardnamurchan. Who is said to rome around this area of coastline each night, looking for people to eat for her supper and who has even had local villagers writing poetry about her, to warn you of her presence and to tell you why you should never be out at night and alone in this area: Among the mountains' midway rocks, -------------------------------Wendy Wood This legend of the Wolf Woman of Ardnamurchan, is thought to have arisen back in the day, when real wolfs still roamed around this area of Scotland looking for prey. It is about a young girl from the village of Acharacle, who found herself walking across the heather moorland on a dreich winters night, to the village of Glenborrodale. When a large grey wolf jumped out of the mist and attacked her, sinking its fangs deep into her neck. Yet even though she knew she was mortally wounded, as she began to lose large amounts of blood from her wound. She still managed to pull off her apron and ram it into the wolf's throat, as it lunged up at her once again with its jaws wide open, coming in for the kill. The wolf then tried as hard as it could, to dislodge the tight ball of cloth now stuck in its throat, by shaking its head. But soon realised it could not dislodge it and neither could it breath, so collapsed dying at her feet. But due to the continuing loss of blood pouring from her neck, she too began to lose consciousness and fell on top of the dying wolf. And where it is said, that they both died together at the exact same moment. With both of their souls simultaneously rising up out of their bodies, to mingle and blend into one. How to get there: Tioram Castle to Ardtoe Bay is around a 7 mile drive and which should take you only half an hour or so to drive. But as there is much to see and photograph on the way, I would advise that you probably need to allow yourself, at least a couple of hours to complete this part of your journey. So first of all, you need to drive back up and along Dorlin Road, the same way you came in to the Tioram Castle area. Until you eventually rejoin the A861 at a 'T' junction and where you will now see a sign, pointing you towards the Village of Salen further along the A861 on your right, Street View, Map View. Take this right hand turn. Now continue all the way down this road and all the way to the very end of it, where you will first pass by the infamous 'Monster Midge' rock, as shown below in SHOTS 1 and 2. And then onto the tiny village of Ardtoe, with its reasonably large official car park and its honest box payment system, Street View, Map View and park your vehicle here. I believe the honesty box payment was £2 the last time we were there if I remember correctly and which you can pay, by placing a couple of £1 coins in a small letter type box, that you will see in a door at the opposite end of the car park. So having now paid your parking fee, walk out of the car park and turn immediately right. Then continue on walking past the first small beach area on your left, with its large ugly pipe at low tide and then on past a couple of houses and caravans on your left, then around to the entrance to the beach a little further on. My first and probably most important piece of advice that I can give to you for this location, is that if you want to get anything worthwhile photographically, then you need to be here at or around, a 3/4 ebbing tide. But even better than that if you can time it, is to be here when there is going to be a really low tide in winter, as well as where that low tide coincides, with the time the sun is due to set. And this is why I need to go back here, as I know this has the potential to be an amazing seascape location for a sunset shoot, even though I wasn't able to stick around for it this time. So we will just have to go back. |
|
 |
 |
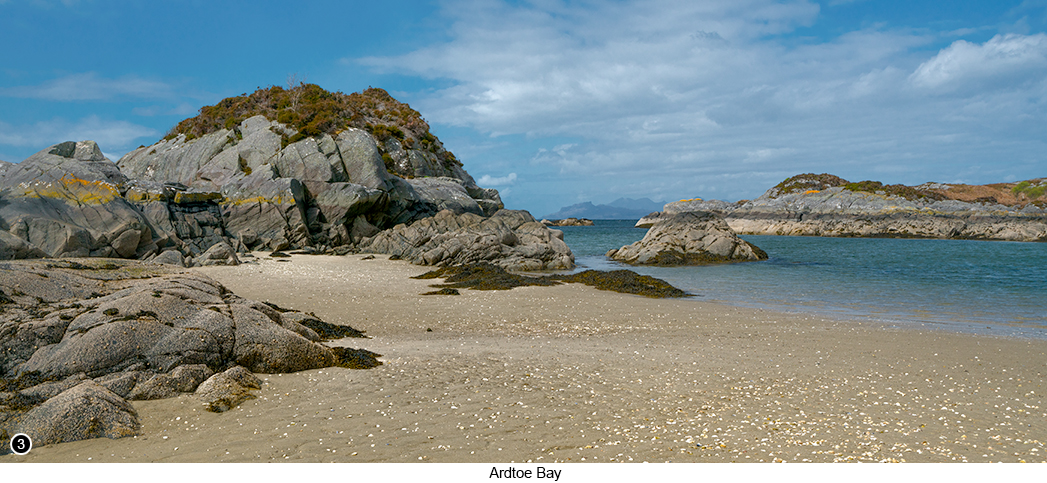
Then once at the top of the beach, you will probably first notice there is a strong smell of sulphur wafting through the air. Which I believe comes from the rotting vegetation and seaweed beneath the sand - or perhaps it could be a lingering smell from the previous night, after the soul of the Wolf Woman passed through this area, looking for someone to eat, who knows? But anyhoo, if you then walk out towards the sea in the near distance, you will soon come to an area of larger rocks and boulders, over on your front left. So assuming you are here when the tide is at its 3/4 low point and going out, you should be able to walk down the beach and get right in among these rocks and boulders, to line up your shots from there, as shown in the pano below in SHOT 3. I did wear a pair of rubber boots for most of the these shots, so I could walk through some of the deeper but receding tide waters, before anyone else could get in there before me. Thereby making sure I could fully get into this area, before anyone else had the chance to ruin it, by walking through it with their size 12's and a couple of dogs - Isn't it a really happy moment for us landscape photographers, whenever we arrive at a sandy beach, or perhaps an area with fresh snow and we are the first person there, so that everything still looks pristine and new? Hence why I am now suggesting, that you put on your rubber boots for these shots, so you can be the first person in there and still have all that pristine, untouched loveliness to yourself. |
|
 |
|
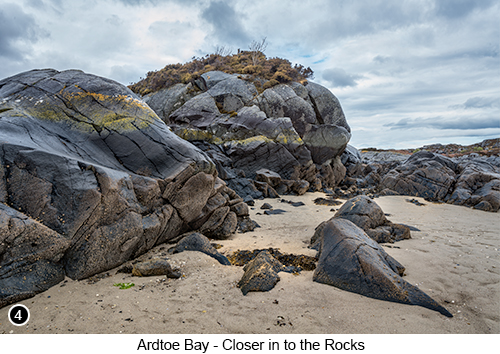
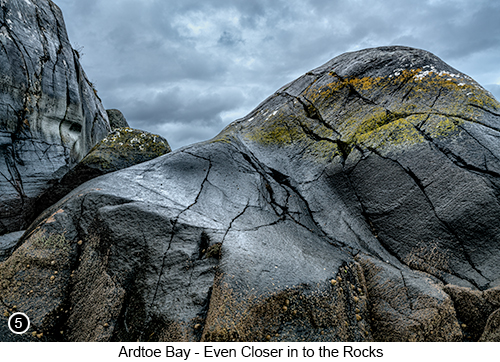
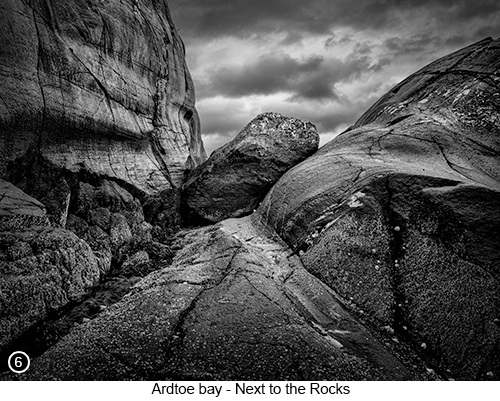
So after taking your initial wider angle pano shots of the beach and rocks, which I suggest you do before walking any further into the bay and putting your own size 12 boot prints into it. You can then start to slowly shoot your way into the scene, grabbing more and more, of those interesting details and shapes as you go, as shown in SHOT 4 to the Right. I then continued to work the area and get ever more excited, about the shapes I was seeing in the rocks and how they had been sculptured, rounded and polished by the last ice age. And how I could use those details and shapes in my compositions, as shown in SHOT 5 below. I then move in even closer to the rocks, looking for colours, tones, cracks and shapes, as well as composing my shots in such a way, that I could capture the moody sky above them. In fact I was really quite lucky, because when I looked up at the sky, it was obvious it was about to start raining any minute, so I knew I had to work quickly. Yet even so, the sun was still shining softly on the front faces of the rocks, allowing me to shoot them front lit, but with lots of nice dark brooding skies above them. I did have to bracket some of these shots, as shown in SHOTS 5 and 6 below. But that is something that is quite an easy thing to do these days, what with so many cameras allowing you set up a bracket sequence, by selecting just one item in the menu. As well the many programs now available, that allow you to seamlessly align then combine, several shots together with different exposure times. |
 |
 |
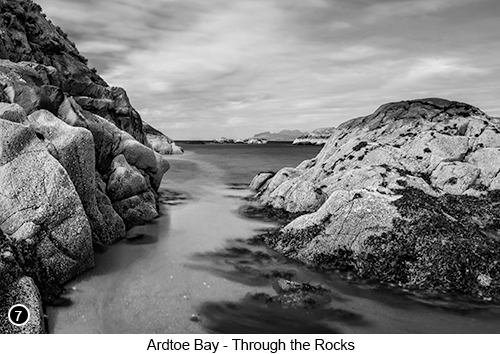
Although I do still tend to do this type of 'Blending' work myself by hand and which I just happen to have explained in great detail, throughout my Landscape Photography Masterclass and Guide Book. But then you already know that don't you, because you bought your copy of it years ago and have studied it to the point, where it is now a bit dog-eared with wear. As well as using it to take you, to all those many hundreds of beautiful photo locations I describe within it. You have haven't you? Then after shooting the main rock structures up close, I looked around and noticed that the tide had now gone out even further. So I began to work my way around to the right of the main area of rocks, as I started to walk out into the sea to the height of my wellies, where I set up to shoot a 30 second exposure, as shown in SHOT 7 below. I really liked this composition, as shown in SHOT 7 below. With its view of the distant mountains through a natural channel in the rocks. That I was using to create a nice leading line into the shot for the viewers eye to follow and where the waves kept on surging through it, swirling the seaweed around to give it some motion. Tip - Shopping for Photographs: Sometimes, and as I have already mentioned above, you arrive at a scene and realise, that you are going to have to shoot your way into it, so that you don't damage the look of it with your own footprints. But I would also argue, that more often than not you will also find, that have to shoot your way into the photograph itself - so what do I mean? |
So let me put it this way by using shopping as an example: where one weekend, you feel a bit down in the dumps, so if for no other reason than to cheer yourself up, you take yourself off to the city for a bit of retail therapy (shopping). You have no idea what you are looking for, or what you are wanting to buy. But you do know, that you want to buy something that will cheer you up. First you look at the obvious shiny things, such as expensive watches, or things made out of gold etc. Then you move on to look at some of the latest electronic gizmos, gadgets and TV's etc., and so on and so forth. Then you finally end up in the clothing department and after browsing around for a while, you suddenly spot that one single item, that has your name written all over it. You take it off the hanger and try it on and it fits perfectly and not only makes you look good, but feel good. So off you trot to the till, with your credit card in hand to buy it. Then to round things off completely, you seek out the nearest coffee shop and go in for a well earned sit down and a drink. As you continue to pamper yourself, with a slice of what must be the most expensive chocolate brownie, ever made on planet Earth. So what exactly, has this got to do with landscape photography I hear you ask? Well everything really. As that is pretty much the exact same thing you are doing, when you are out with your camera hunting for compositions. Because just like with the retail therapy idea, you are out there looking for something, anything, that will give you that rush of satisfaction. Even though when you first turned up at the scene, you had no idea what it was that you were looking for and especially if you've never been there before. |
 |
 |
So you start exploring the area, looking for something that is unique to you and your vision. Where first you go for the obvious, such as shooting the mountains (the shiny thing). Which after shooting them for a little while and bagging a few decent shots, you soon begin to realise, they are still not quite hitting the spot for you - sound familiar? So you go for the next obvious thing, a 'Fine Art' long exposure seascape shot, using your 10 or 15 stop ND filter (gizmos). But even though you know they will come out OK. You also know they will probably look no different, than the shots everyone else has taken here before you. So again not quite hitting the spot - ringing any bells yet? You then start to scratch your head for a while and think, OK, if nothing special is jumping out at me, then I might as well throw everything I possibly can at it, just to see what happens. So next you get out the big guns and go for some super-zoom abstracts and panos and perhaps even a few macro shots, but still nothing is working to your full satisfaction. Until suddenly, while half heartedly concentrating on one thing, you catch a glimpse of something more interesting out of the corner of your eye and straight away you know, it's the thing you've been searching for all along. That you instinctively know, will not only hit the spot, but will hit it slap bang in the centre. Then everything else around you becomes secondary, as you begin to hone in on your target. So what I am trying to say here in my usual long winded style, is do not turn up at a location and expect to immediately see, the exact thing that is going to excite you photographically. |
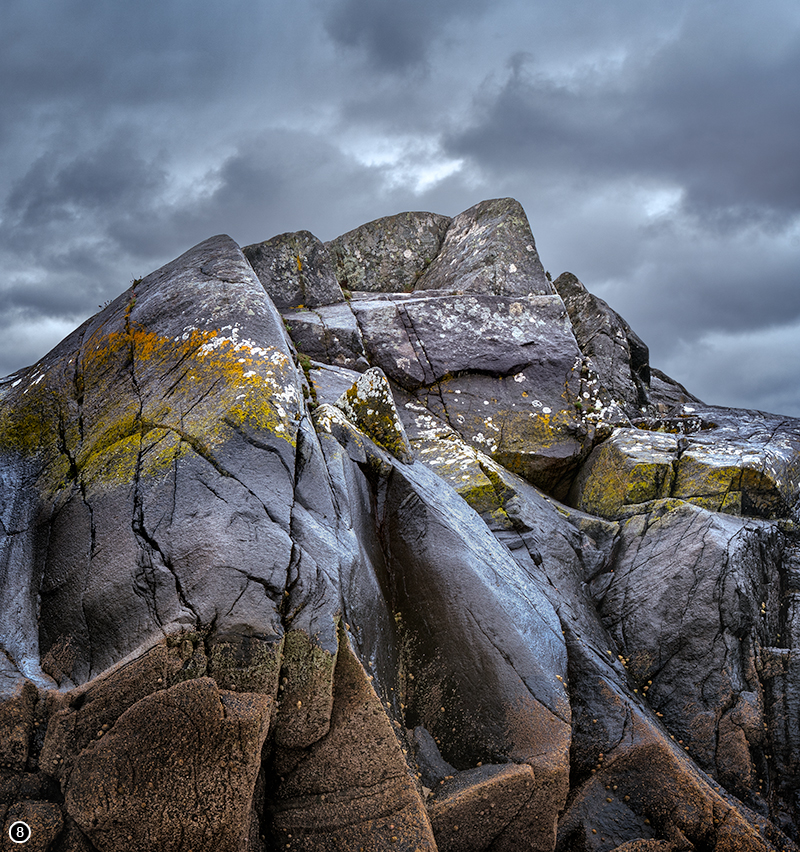
Yes this can and does happen sometimes, but from my experience, it is not usually the case and so I know I will have to hunt (shop) around for a while first, if ever I am going to find out what it is that I want. Which as soon as I have found it (gets out his trumpet and starts blowing it loudly), which I usually seem able to do eventually, means I can then start to throw everything I have at it. Now this is just my way of working of course and you might have a totally different method, that works perfectly for you every time. As we all do and see things differently don't we? But I do believe that more often than not, if we want to achieve something as landscape photographers, as well as satisfying our photographic needs and desires. Then we have to be prepared, to work ourselves up into a higher state of mind and develop a new way of seeing, identifying and discovery, for each location we photograph. Especially if we want to produce something new from a location, that no one has seen or photographed before. Or even if they have, then not in quite the same way, or with the same feeling of connection, as shown below. So am I saying the shot shown below is a work of art? No I am not. But what I am saying, is after several hours of looking and working the scene, this is the shot that finally hit the spot for me and put a wide, satisfied smile on my face. |
|
 |
|
Exif information for each of the numbered shots shown throughout this chapter --1 - Canon EF16-35/2.8L USM, 1/30th Sec, f/16, ISO 100, Focal Length 35mm, taken on 23rd Apr at 15:00 --3 - Canon EF16-35/2.8L USM, 1/200th Sec (3 shot pano), f/11, ISO 200, Focal Length 35mm, taken on 23rd Apr at 12:23 --4 - Canon EF16-35/2.8L USM, 2/3rd Sec, f/16, ISO 50, Focal Length 27mm, taken on 23rd Apr at 13:50 --5 - Canon EF16-35/2.8L USM, 1/30th Sec (+/- 2 stops), f/16, ISO 50, Focal Length 35mm, taken on 23rd Apr at 14:10 --6 - Canon EF16-35/2.8L USM, 1/250th Sec, f/16 (+/- 2 stops), ISO 50, Focal Length 20mm, taken on 23rd Apr at 14:15 --7 - Canon EF16-35/2.8L USM, 30 Sec, f/22, ISO 125, Focal Length 17mm, taken on 24th Apr at 12:31 --8 - Canon EF16-35/2.8L USM, 1/100th Sec, f/16, ISO 50, Focal Length 32mm (cropped), taken on 23rd Apr at 14:19 |
|
If you have enjoyed reading these 'Extra' chapters to my Guide Book and think you might also enjoy reading 79 more chapters across 270 pages, that also includes more than 340 Fine Art quality images, along with detailed descriptions and large scale maps to guide you to the exact location of where I took each and every one of them and which then goes onto discuss the techniques and tools I used to process them, but where everything is written in plain easy to understand English? Then please consider buying the Book. |
|